How to create a Lesson using the Mark the Words Component?
This is a content type where the end user highlights words in a text or expression. The end user is shown a solution after highlighting all the words in a text according to the task description. Editorsenter text and mark words to be replaced with asterisks.
When to use this Component
Mark the Words component allows content designers to create textual expressions with a defined set of correct words. So, it can be used effectively in any subject where you want the students identify and highlight the correct words from the given text.
How it works
-
User clicks to highlight the correct words within the expressions and clicks the Check button to check the answers.
-
If the user has highlighted the correct words, it will be highlighted in green with tick mark. If the user has highlighted any wrong word, it will be highlighted in red with a cross mark.
-
Scores are shown at the bottom left side of the page. Retry and Show solutions buttons appear at the bottom right side of the page.
-
You can retry and highlight the words by pressing the Retry button.
-
When the user clicks the Show Solutions button, all the correct answers are highlighted.
Features of this Component
-
You can enable the "Retry" button and "Show Solutions" buttons.
-
You can add as many expressions and correct words as you like.
-
Scores are shown at each attempt.
You can create a page using this component by following the below steps.
Step 1: Go to the required Slide
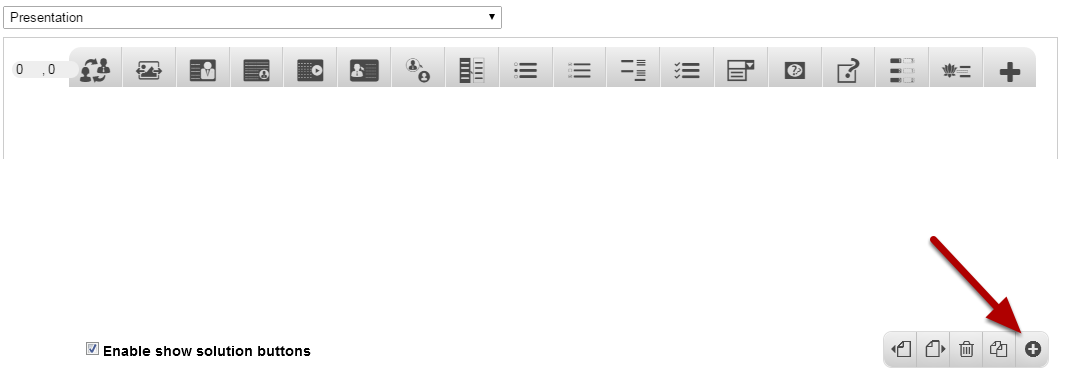
If you are creating a new Presentation, you will be taken to the first slide where you can use this component and create a page. Alternatively, if you want to add a new slide where you want to use this component, click on the '+' icon on the lower right corner as shown in the above image.
Step 2: Click on the Mark the words Component Icon
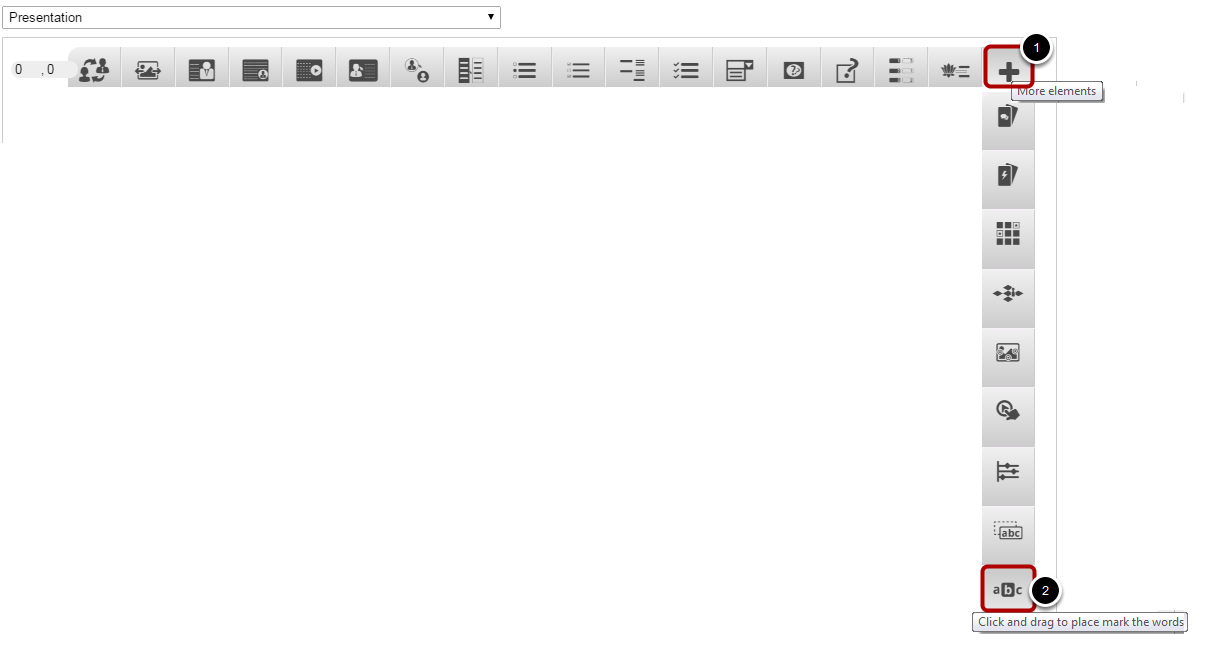
Then click on the More elements [1] icon and click the Mark the Words [2] component icon as shown in the above image. You will see a screen similar to the image shown below.
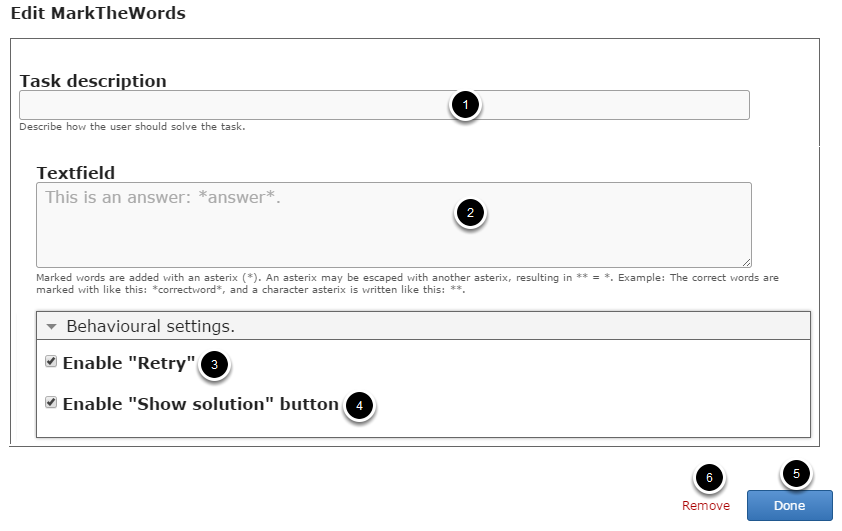
On this screen, you can
-
Add some task description text or contents on the Task Description [1] field. Please note that this field is mandatory.
-
Add the text on the Textfield [2].
-
Enable the Retry option by clicking on the Enable “Retry” [3] checkbox.
-
Enable the show solution option by clicking on the Enable “Show Solution” button [4] checkbox.
-
Click on the Done[5] button to save the changes.
-
Remove the component from the page by clicking Remove [6] button.
Step 3: Add Task Description
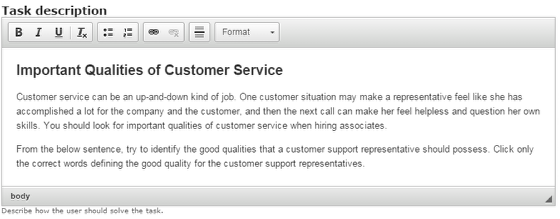
In the Task description field, we give the end user's basic instructions or introduce the problem to be solved. You can also change the format of the text, add and remove hyperlinks and insert horizontal lines between the contents. This field is mandatory.
Step 4: Set the Blanks and corresponding Answers
Under Text field, enter the text from which the user has to select the correct words. Marked words are added with an asterisk (*). An asterix may be escaped with another asterisk, resulting in ** = *. Example: The correct words are marked with like this: *correctword*, and a character asterisk is written like this: **.
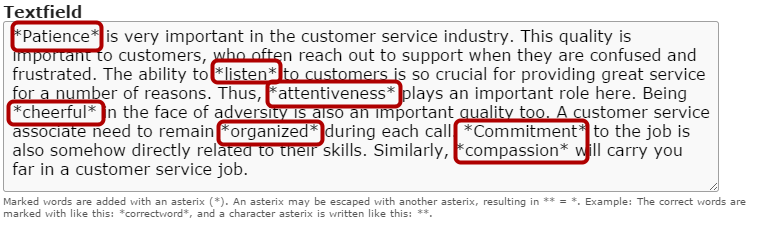
The author of the page types in the text and encloses the words that the user is supposed to click with asterisks like *correctword*.
Step 5: Set the Behavioural Settings

You can view the Behavioural settings as shown in the above image. Click on the down arrow mark to view the Behavioural settings options.
Step 6: Enable Retry Button (Optional)
If you click Enable “Retry” checkbox, you can give more chances to the user after seeing the correct answers using Show Solutions option. This option is optional, and so tick the checkbox if you need so. By default this checkbox will be checked.
Step 7: Enable Show solution Button (Optional)
If you click Enable “Show solution” button checkbox, users can see the correct answers in the text expression. This option is optional, and so tick the checkbox if you need so. By default this checkbox will be checked.
Step 8: Click the Done Button

Once you've updated all the details, click the Done [1] button shown above to complete editing the page. You can cancel creating the page just by clicking the Remove [2] button shown above. If you click the Done button, you will see the below screen with a preview of the created page.
Step 9: Click the Create Button
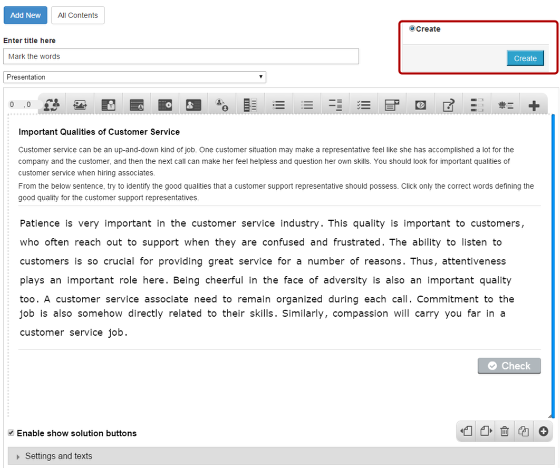
If you still want to edit the page, just double click on the preview page, and you will be taken to the Edit page. If you've done all the changes, you can click the Create button as shown above picture to finish editing the page.
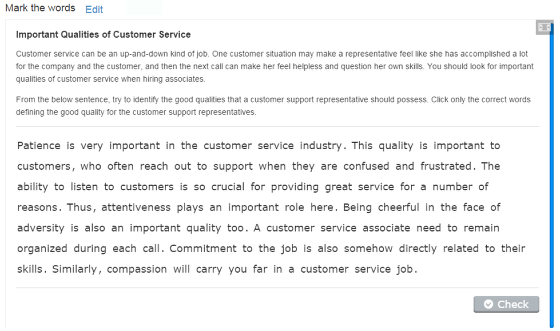
You can see the finished page created with Mark the Words component as shown in the above image.
Notes
-
You can create only one Text field in a page using this component.
-
You can add as many expressions and correct words as you like.
-
End users can highlight any word within the expressions. Any word that he/she clicks will be highlighted regardless of whether they are correct or wrong.